This is part 2 of my series on Home Automation
- Introduction
- Sonoff
Sonoff
In my last post I mentioned that after buying a Google Home, I wanted to try to automate some aspects of my house. After disappearing down many rabbit holes, a colleague suggested that I look at a device called a Sonoff from a company called ITEAD. Most of the Sonoff devices are based off the ESP8266 chip, which is a simple micro-controller with built in WiFi.
Sonoff Basic

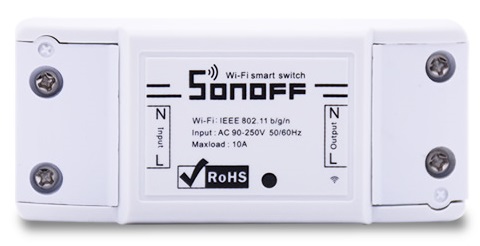
I started off with a Sonoff Basic, which is a WiFi enabled smart switch that enables you to control devices using the ITEAD app (or the Google Home/Amazon Echo). They're relatively cheap (+/- R125 or about $8) so I thought they would be a good way to get my toes wet in home automation.
Simple usage
The simplest usage of the Sonoff Basic would be as follows:
- Attach mains voltage to the input terminals
- Attach some sort of appliance to the output terminals
- Power it up and connect it to your WiFi (using the ITEAD eWeLink app)
- Use the app to switch your appliance on or off
- There is also a physical switch on the top to toggle the relay manually
- Your Google Home / Amazon Echo can be integrated with eWeLink to allow voice control
- Placing the Sonoff Basic inline on a short extension cord would allow you to control just about any appliance that can be plugged in (just remember that the device is only rated for a current of 10A)
Lets get complicated
I however decided to complicate matters slightly. I noticed that the company I was buying it from offered to flash a custom firmware onto the device. Being the curious developer that I am, I went for that option. The custom firmware is called TASMOTA.
Flashing TASMOTA opens up a lot of possibilities and extra functionality not available on the standard Sonoff device. Features such as:
- You're not reliant on a 3rd party cloud infrastructure to control your house (this is the number one reason I was keen to try TASMOTA)
- Control/status via an MQTT broker, which in turn allows integration into just about any home automation system
- Built in rules
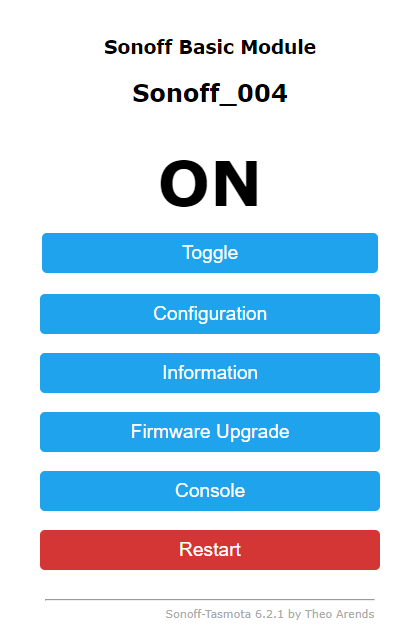
- Web interface
- Over the air updates
- Access to the other pins on the ESP8266 (some soldering required)
As mentioned, my Sonoff came pre-flashed with TASMOTA. I have since bought the required equipment to flash them myself, perhaps that will be another post, but there is already plenty of content online about how to do that.
How I used it
- To keep things simple, I installed the Sonoff inline in a short extension cord. I then plugged our lounge lamp into the new cord.
- Without the eWeLink app, the WiFi connection option is a bit different, there a few options available (you enter the mode by pressing different button combinations):
- When flashing the firmware, set the WiFi details (this wasn't a option for me as it was already flashed)
- Start the device up as a WiFi access point and connect to it directly (this is a common technique used to configure Wifi IOT devices like the Google Chromecast)
- Use an Android app called ESP8266 SmartConfig
- Use Wifi Protected Setup (WPS) if your router supports it (mine does but it's a pain to use)
I ended up using the Access Point method and configuring my WiFi details. There after I was able to switch the lamp using the button or the web interface of the Sonoff. This was all well and good, but not super useful. I needed some way to control the device remotely without having to log into it all the time. But that's the topic of my next post, coming soon.

